How to Transfer Your Videotapes to Your Computer
Do you have a pile of videotapes taking up space in your home? Or, do you want to archive your VHS/Beta videos for posterity or easier viewing on a computer or tablet? There are many reasons why you might want to convert your videotapes to a digital format. Here’s how to do it.
Using a Service
Many services have cropped up that will convert old media (i.e., VHS tapes) to new (i.e., digital files).
If you’re just converting one VHS tape, these are a good deal. But if you have many, it can get expensive really quick, at around $20 or more per tape.
If you prefer to do it yourself, and you still have your VCR, read on!
An All-In-One Solution
One product that you can use to digitize almost any analog video source that does NOT require a computer is the ClearClick Video to Digital Converter, available on Amazon.
This unit is extremely easy to use because there are no drivers, installation process, software, etc. You just plug in your video cables and go!
The downside is that’s expensive at $200. But, if you have a lot of tapes to convert, it could be worth it.
A Cheaper Solution Using a Computer
I used a Windows PC, but you can get a video capture device that works on a Mac. You’ll also need some RCA cables, usually colored white, red, and yellow. Often, these cables come with your VCR or TV.
One caveat before we go any further: computer video capture products are notoriously finicky. I had to try a bunch before I found this one, which worked for me. If you do decide to purchase one of these, please make sure to get it from somewhere with a good return policy, like Amazon.
USB Video Capture
A USB video capture device converts a composite video (or S-video) signal to a digital file on your computer. There usually isn’t a tuner, so no watching broadcast TV or recording off the air.
The one I used is the Play X Store Chip USB2.0 Audio Video Capture Adapter for Windows. This one does not work on Mac, but there are similar ones that do.
These USB video capture devices are pretty cheap these days (because they are cheap Chinese knockoffs of each other). Here are some others, which probably use the same chipset as the one I used:
Setup
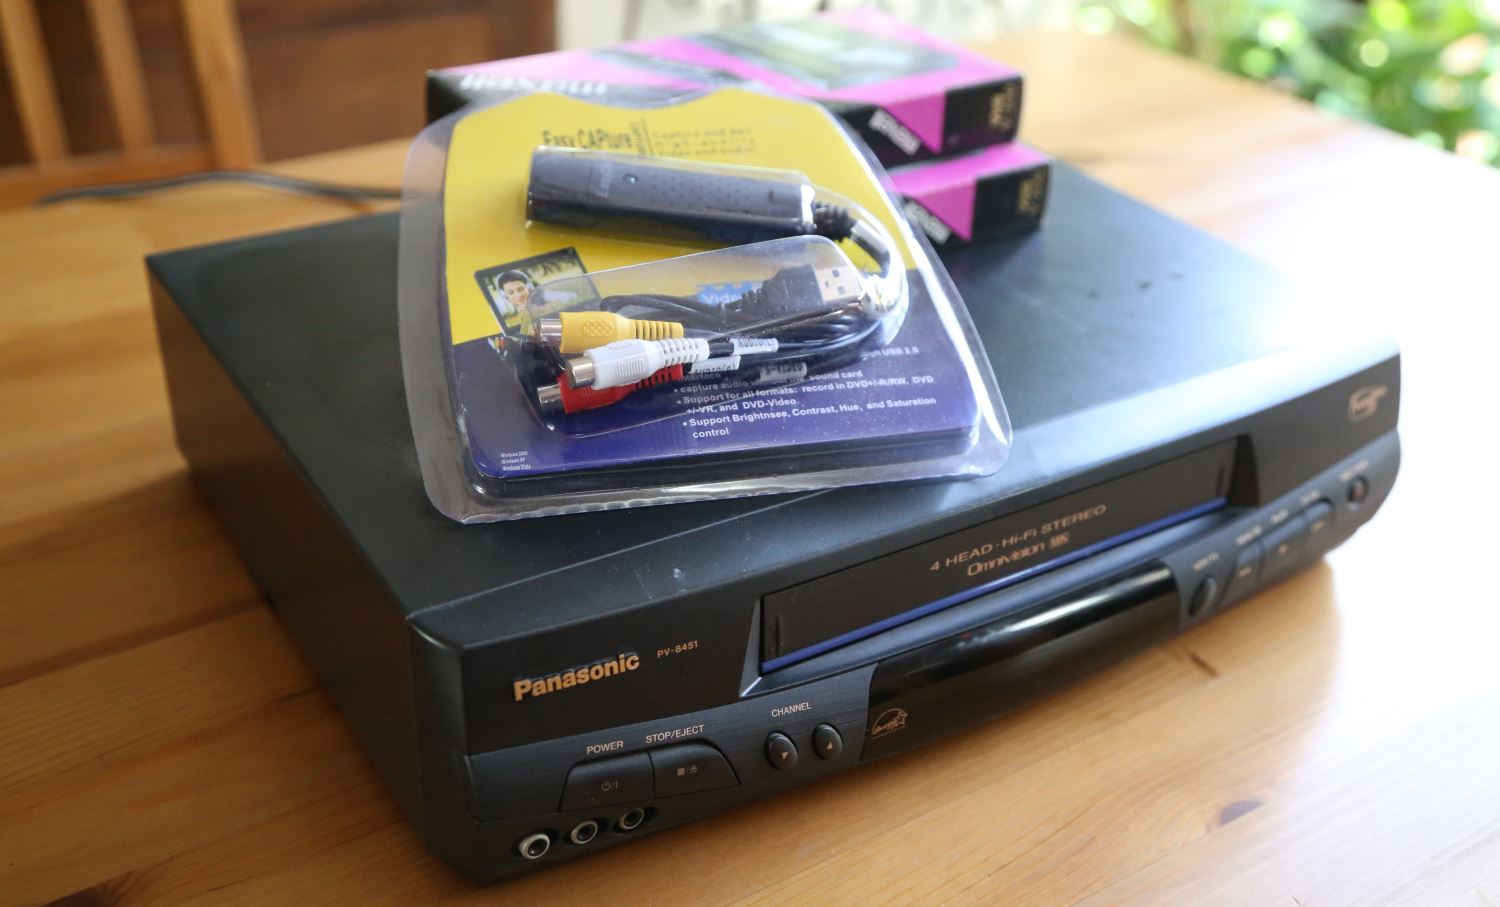
The method I’ll show here involves using a USB video capture “stick” with a Windows 10 machine. I chose to use a USB video capture stick, the Play X Store USB 2.0 Audio Video Capture Adapter from Amazon.
This is not a name-brand and seems super sketchy, I know, but it had good reviews, so I gave it a try.
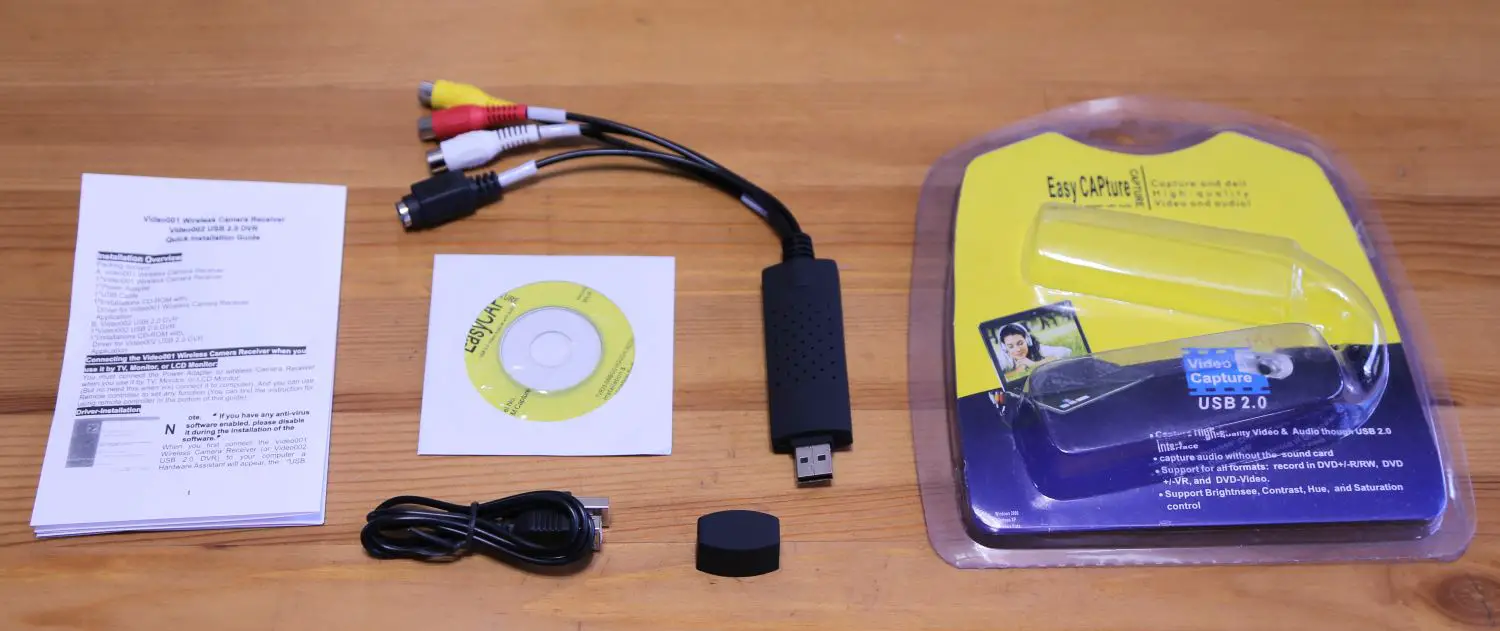
It includes the actual USB converter stick, a short USB cable, driver CD, and instructions. The instructions were written in broken English, which did not inspire confidence, but I moved forward!
The instructions tell you to plug the device in, then load the drivers off the CD. But, I wanted to make sure the CD’s drivers were loaded, not Window’s drivers, so I installed the drivers from the CD first, BEFORE ever inserting the USB stick. That insured that the proper drivers would be loaded.
Note, the Amazon description says the product includes video editing software. It does not! But for this price, I wouldn’t really expect it to.
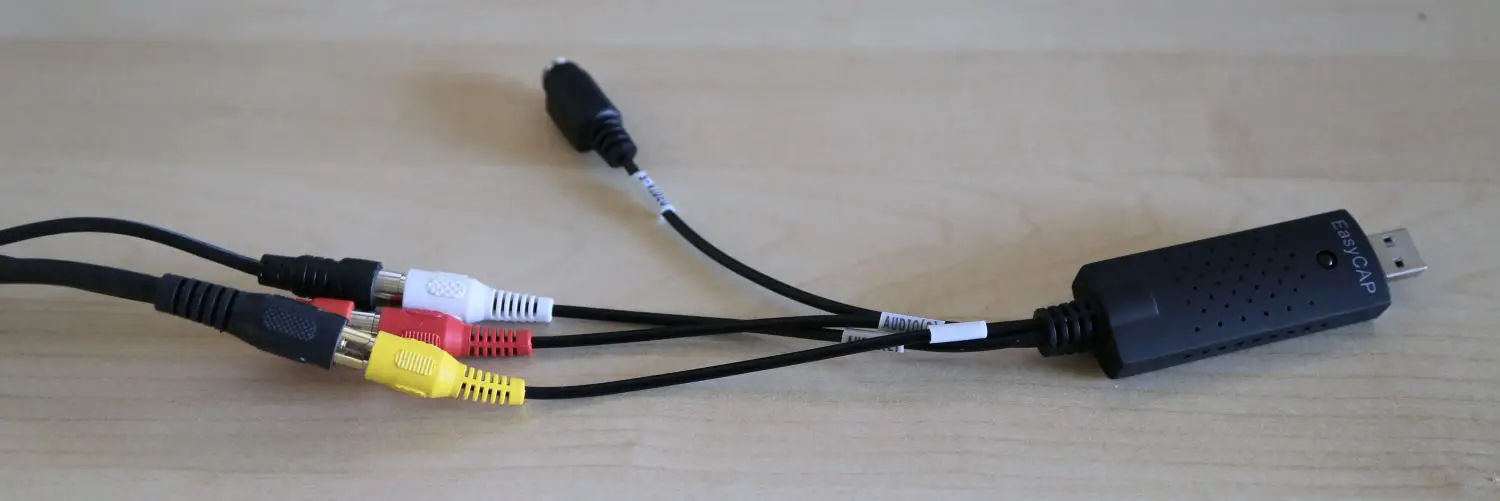
After the drivers are installed, the connections are pretty easy. Connect the RCA cables to the dangling female cables on the USB stick.
Connect the other end to the audio and video OUTs on your VCR.
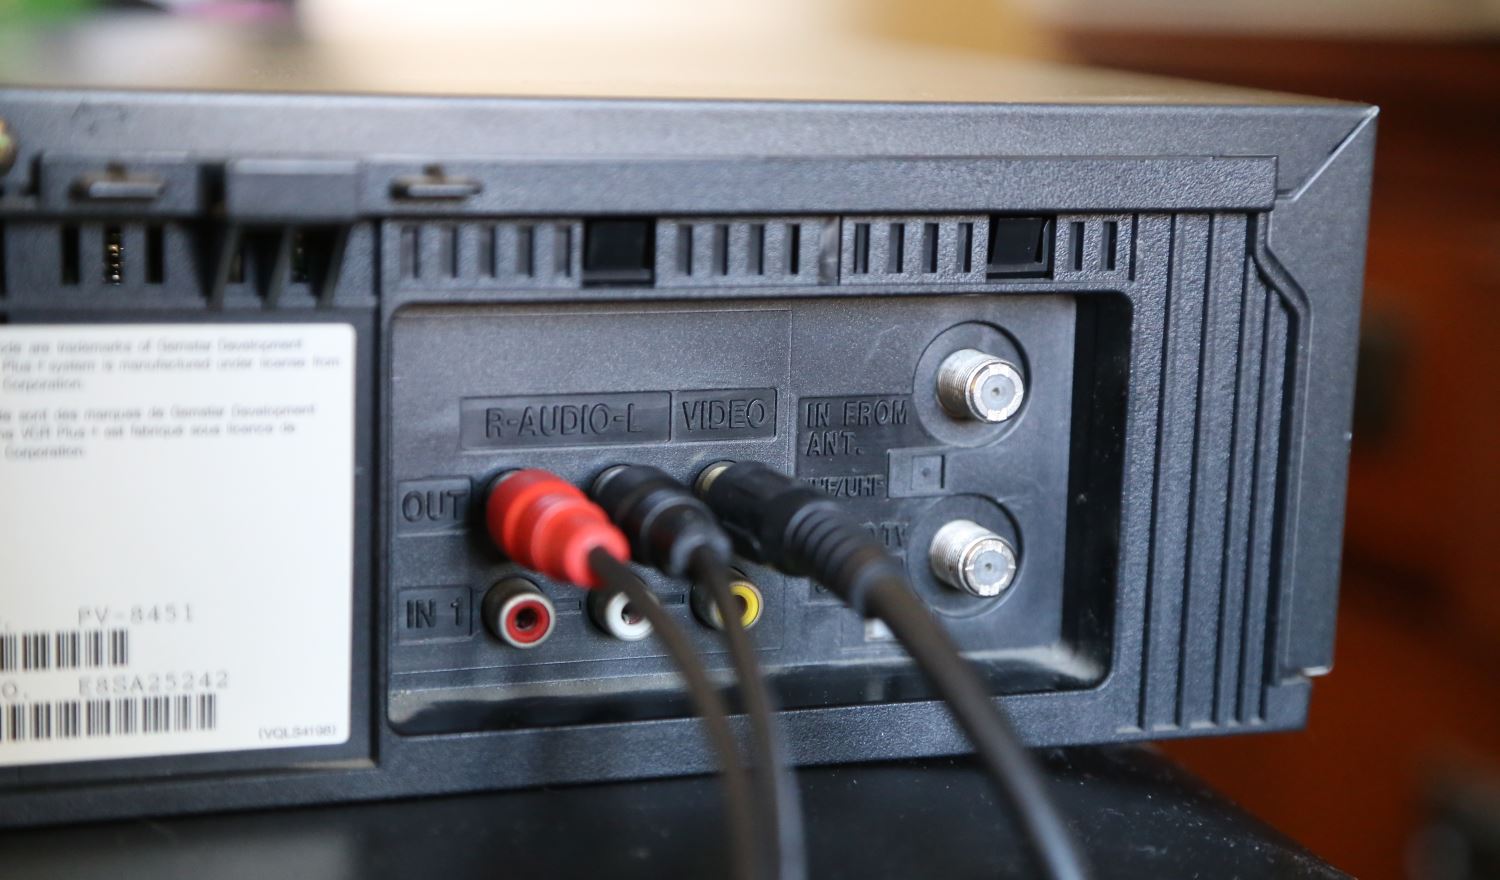
Alternatively, you can use a single S-Video cable if your VCR supports it. Then plug the USB stick into your computer.

Launch the “honestech TVR” app (I know, sounds super sketchy!!). You’ll see a window showing what is coming out of the VCR. Press “Play” on your VCR, then hit the record button on the software to start recording! Pretty simple!
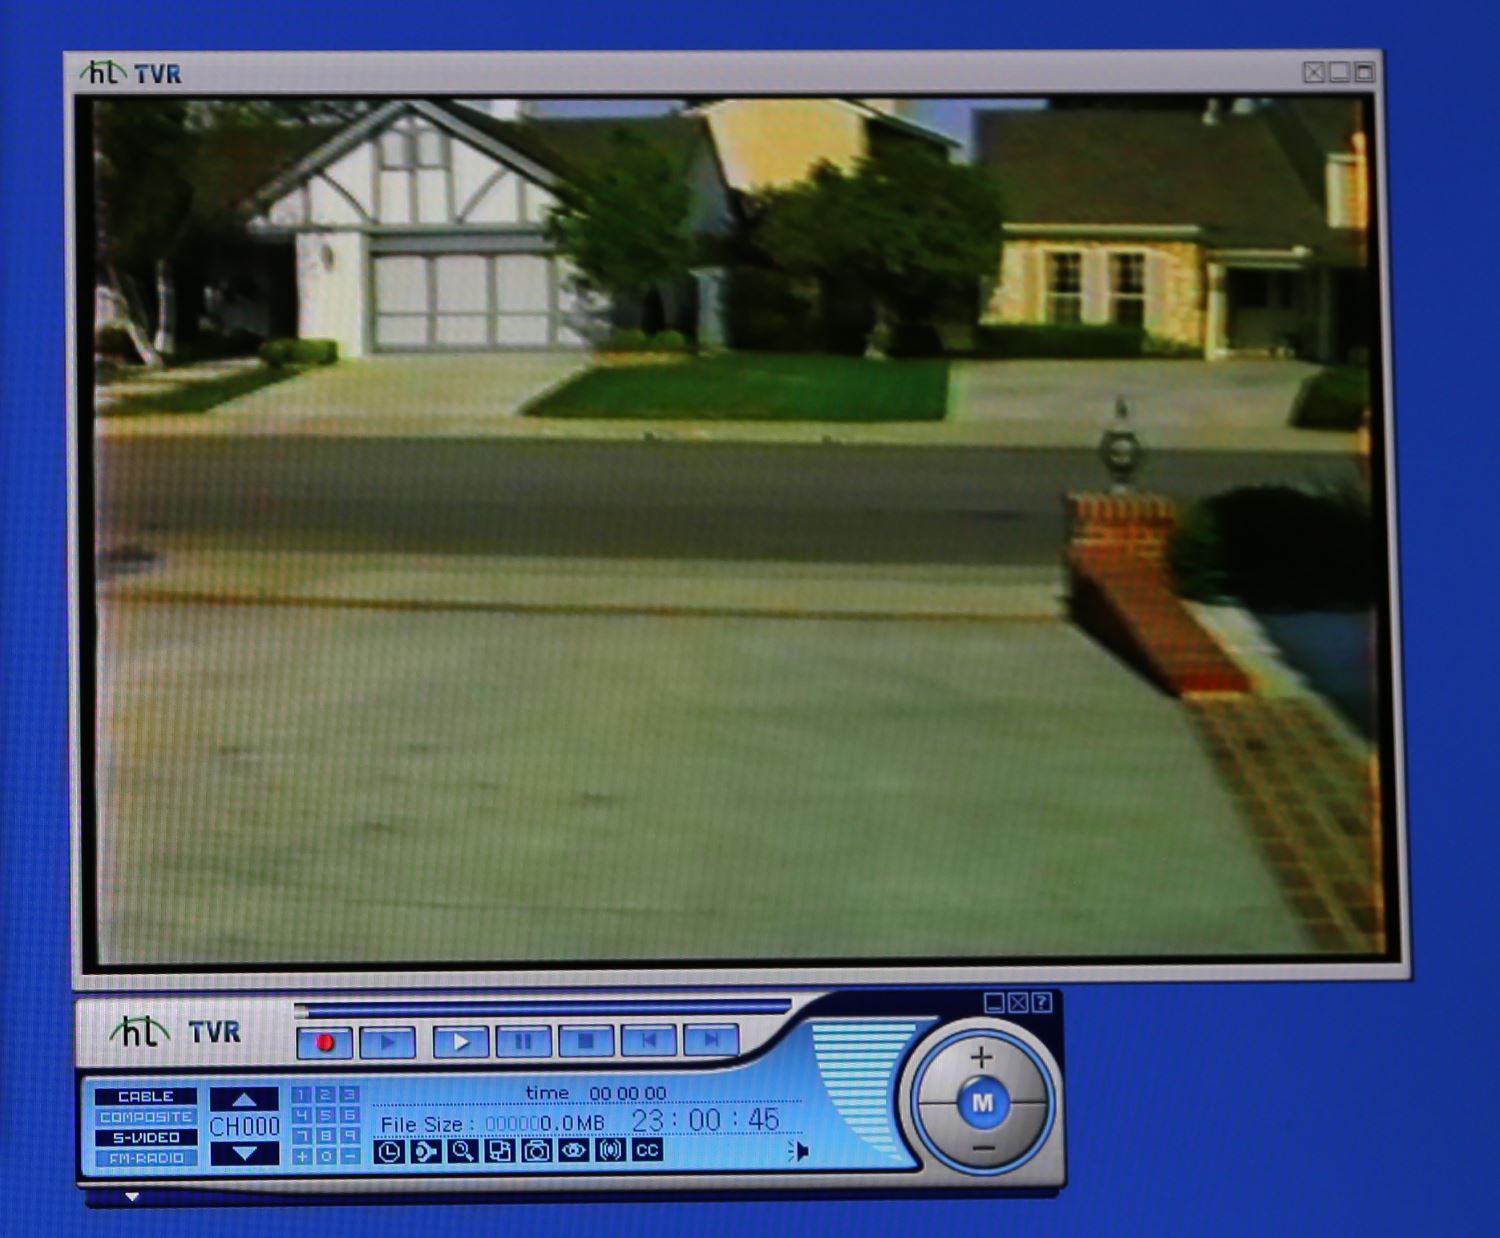
The actual picture quality is better than what is shown here, because I had to take a photo of my screen (a screen capture wouldn’t work on the player).
Recording Options
Before you hit the red Record button, take a moment to think about what recording file format you want to use.
The software is preset to record at VHS quality (320 x 240 pixels). You can change the recording quality up to 720 x 480px (DVD quality), but if you’re recording VHS tapes, there’s no point in doing that.
The file format is preset to MPEG-2 (.mpg file). Note that Windows 10 does not come with an .mpg video player but you can get one here.
You can change the setting to record to an MPEG-4 (.avi) file, which is playable on more software but you’re locked into 352 x 240 resolution at that setting, but is fine for VHS.
Whatever file format you choose, I recommend doing a short test recording to make sure you can play back the resulting video file on your computer before ripping a six-hour VHS tape!!
Doing the Recording
You’ll have to let it run for the entire time that you want to record, so it could be a lengthy process! Make sure your computer’s hard drive has plenty of space. If you’re recording hours of video, you could need many GB of free space.
Cue up your videotape to the point you want to start recording and hit Play on your VCR, then hit the red Record button in the software player. If your tape is long, set a timer and do something else while it’s recording.
When your recording is done, hit Stop and check out the file it created (usually in a sub-folder of your Documents folder).
An alternative method of recording is to simply play the recording on your computer and use screen recording software like ScreenRec to record it. Thanks to reader Shella for this option.
Conclusion
So, although converting videotapes is somewhat of a lengthy process, you actually don’t have to be around for most of it. After you’re done, you can get rid of your video tapes, and you’ll have digital files that won’t degrade over time (unlike magnetic tapes), and that you can share on YouTube and play on any device!
How did it work for you? What conversion device did you use? Let me know below! – Brian
Keep in Touch – Subscribe for Free
If you liked this article, please sign up for email updates. I’ll send you a note when I publish a new article, no more than once every few months. Unsubscribe any time. – Brian


I’m trying to convert my 8mm tapes from camcorder to my computer ,but they only transfer in black and white. so far 3 different converters haven’t made the cut. HELP!!!
Hi Lisa,
Try going from your camcorder to a TV to make sure the analog output is indeed in color.
Best,
Brian
Thanks for the advice. I have 4 camcorders with only one allowing a composite cord. All allow an s-video cord. One of the converters I just got in the mail is AV to HDMI so I’m going to try and input the rca from the camera thru the converter to tv via HDMI. It’s very frustrating trying to get my tapes converted and learn about all of this at the same time. I very much appreciate you getting back to me.
Thank you for explaining that you can use a service to digitize your files, which could be a good option if you have a few VHS tapes to convert. My friend has been talking about getting her old family videos digitized so that they can watch them again. I’ll be sure to mention this to her and see if she’d be willing to hire a service to help her. https://nowandforeverdigital.com/video-conversion
Hi Olivia,
Thanks for sharing. Yes, a service is a good option for converting VHS tapes, as they take quite a long time to do manually.
Best,
Brian
i did all of this on my home pc
i used Easycap USB 2.0
when i play the VCR i see the video on my pc screen (in the honestech TVR 2.5 software) just fine,
but when i try to record i get an audio lag and frame drops, i tried diffrent formats and all the same lag,
any suggestions?
note, i have 3 rca cable (white yellow and red)connected to an adapter which connects them to the vcr, i dont know the name of the adapter, the one will a lot of pins
thanks all
I used honestech software but could only get back and white. Mpg4 format was my format choice. Is there yet another setting?
I am capturing vhs using UCEC card and get files. Good BUT — how do I move these (ex. mp-4) file to DVD -R. I have tried different output formats UCEC provides; it appears files move to my DVD drive but no finalize – DVD player does not read disk. Any ideas; appreciate your assist. Gerry, Brookfield WI
Hi Gerry,
You’ll have to consult your DVD player’s manual to see what audio file format it can play.
Best,
Brian
My operating system is Windows 10. I purchased the Honestech TVR 2.5 system. I downloaded the software put in the Serial number to complete the installation. The first time I tried it, I saw myself throught the computer camera, then I switched to see the USB and I tried to capture a small amount of video from the VHS player. But now when I load the software and try to play a vhs tape I only see a white screen and neither the computer camera or the USB connector is talking to the software, I just see the white screen.
Hi guys !
I need some help on how to convert my vhs c tapes by myself and i hope i can find some solutions to my questions here :)
I was bored of paying 30$ to a professional each time i have to transfer a tape so I bough this set up : https://www.amazon.fr/gp/product/B078H54QDR/ref=ask_ql_qh_dp_hza
It works fine but my video recording file arrives interlaced (image 1) , i can uninterlace it but it makes my file super pixellated and crappy (image 2)
Do you know how i should transfer my videos to have a correct quality as shown on my camcorder screen and not crappy stuff like my linked pictures ?
Thanks a lot for your help, it would mean so much !
Claire
Hi Claire,
Are there any tracking controls on the VHSC player that improve the picture quality at the source?
Other than that, there is software to de-interlacing but it might be expensive and hard to use: https://forum.videohelp.com/threads/381452-Interlacing-issue-and-restoration-on-VHS-capture
Perhaps there is some other post-processing software available…
Best,
Brian